The Essentials of Making Mineral Makeup
When I first dipped my toes into the world of cosmetics, the idea of making mineral makeup felt like a secret only a few were privy to. The alchemy of transforming raw ingredients into a luxurious powder was both enchanting and intimidating.
The beauty of mineral makeup lies in its purity. I remember experimenting with various mineral powders, realizing that the simple blend of mica, titanium dioxide, and zinc oxide could create a flawless finish. There’s something incredibly satisfying about knowing exactly what goes onto your skin.
Creating your own mineral makeup allows for personal expression. You can customize shades that perfectly complement your skin tone, something store-bought products often struggle to achieve. This journey became an art form, a canvas where I could showcase my individuality.
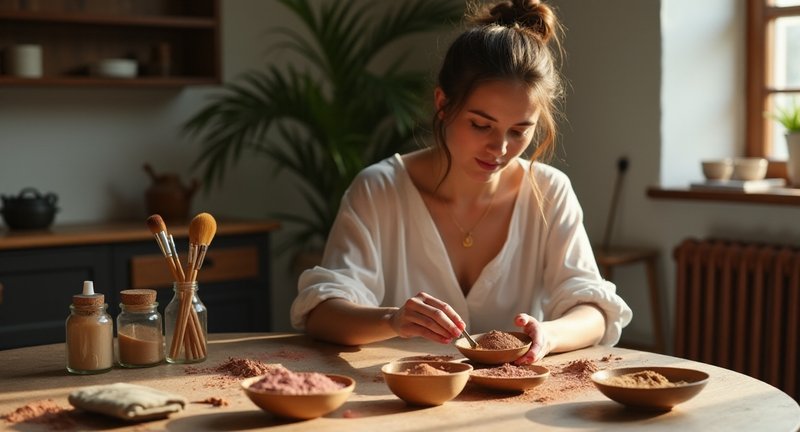
Start with the basics: a good quality base and a few pigments. As you stir and mix, feel free to channel your inner artist. It’s like being in a kitchen, but instead of baking, you’re concocting beauty potions.
Don’t forget to experiment with textures, too! Some prefer a silky smooth feel, while others might lean toward a more matte finish. Every tweak opens up a world of possibilities, and it’s truly rewarding.
In the end, crafting mineral cosmetics isn’t just about the product; it’s about the experience. Each application is a reminder of the creativity and care that went into crafting something uniquely yours. It’s not just makeup; it’s a celebration of who you are.
The Benefits of Making Mineral Makeup
When I first dipped my toes into the world of mineral cosmetics, I was astonished by the myriad of advantages they brought to my beauty routine. It’s like discovering a treasure chest full of nature’s finest ingredients that not only enhance your beauty but also care for your skin.
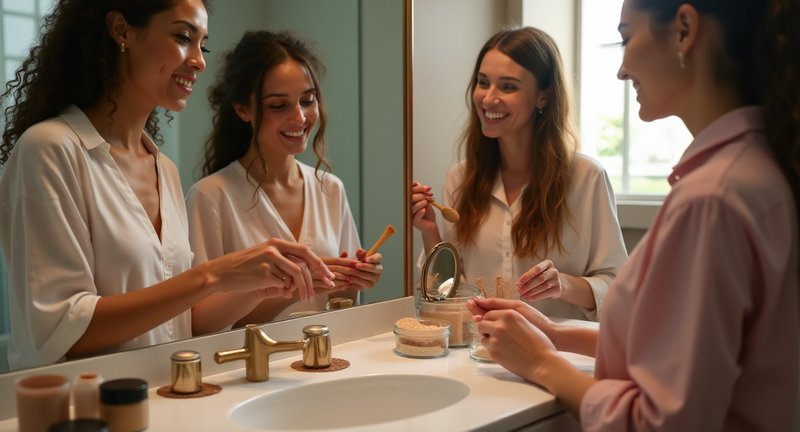
Here’s why I believe crafting your own mineral makeup can be a game-changer:
-
Skin-Friendly Ingredients: Unlike conventional products filled with chemicals, mineral makeup consists of natural minerals like titanium dioxide and zinc oxide. These not only provide coverage but also protect your skin from harmful UV rays. Trust me; your skin will thank you.
-
Customizable Shades: One of the most thrilling aspects of this journey is the ability to create personalized shades that match your unique skin tone. Whether you want a sun-kissed glow or a more subdued look, mixing pigments allows for endless creativity.
-
Lightweight Feel: Ever felt suffocated by layers of heavy foundation? I have. Mineral options provide a breathable alternative that feels as if you’re wearing nothing at all. This lightness enhances your natural beauty rather than masking it.
-
Long-Lasting Wear: You know those days when your makeup seems to vanish by lunchtime? Not with mineral products. Their formulation often ensures that your look stays intact from dawn till dusk, freeing you from the need for constant touch-ups.
-
Skin Soothing Properties: I’ve experienced breakouts with traditional makeup, but the gentle nature of mineral cosmetics can help soothe irritated skin. Ingredients like chamomile and green tea extract not only nourish but also calm any redness.
Creating your own mineral makeup isn’t just about beauty; it’s a ritual that connects you to the earth and empowers you to embrace your authentic self. So, why not embark on this enchanting adventure?
Introduction to DIY Natural Cosmetics
Creating your own natural cosmetics is like embarking on an adventure into the wild world of beauty! As I dove into the point of DIY cosmetics, I found a treasure trove of possibilities that not only embraced my creativity but also catered to my skin’s unique needs. Trust me; there’s a certain thrill in knowing what goes onto your skin, and it all starts with the basics.
Here’s what you’ll need to consider when crafting your own natural cosmetics:
-
Quality Ingredients: Choose organic, cruelty-free ingredients. Look for natural oils, minerals, and botanicals. Think jojoba oil, coconut oil, or even some finely ground cocoa powder for a touch of decadence!
-
Tools of the Trade: You don’t need a professional lab; simple kitchen tools will do. Grab some small bowls, a whisk, and a sifter. If you have a mortar and pestle, even better!
-
Color Play: Natural pigments can come from surprising sources! Beetroot powder for a pop of pink, turmeric for a warm glow, or activated charcoal for a bold touch your imagination is the limit.
-
Scent and Sensibility: Add essential oils for fragrance and skin benefits. Lavender for calmness, tea tree for its antiseptic properties, or a hint of citrus to uplift your mood.
-
Test and Tweak: The beauty of DIY is the freedom to experiment. Mix, match, and adjust until you find the perfect balance. A dab here, a sprinkle there, and voila!
I’ve found that each batch tells a story, reflects my mood, and aligns with my values. So, grab your ingredients, unleash your inner alchemist, and let’s craft something magical together!
Understanding the Basics of Homemade Mineral Foundations
In the context of understanding the basics of homemade mineral foundations, it’s like embarking on an enchanting journey where you get to blend your own beauty elixirs. Let me tell you, there’s something magical about crafting your own makeup. Not only do you get to tailor it to your skin type, but you also know exactly what’s going on your face no hidden nasties here!
Key Ingredients to Explore:
-
Mineral Powders: These are the stars of your foundation. You might consider:
- Mica: Adds that luminous glow.
- Titanium Dioxide: For UV protection and coverage.
- Zinc Oxide: Offers soothing properties, perfect for sensitive skin.
-
Binders: To hold everything together. Think:
- Jojoba Oil: A fabulous skin hydrator.
- Beeswax: Gives that solid form while being oh-so-nourishing.
-
Colorants: Time to get creative! You can use:
- Cocoa Powder: For a beautiful bronzy hue.
- Spirulina: A quirky green that can neutralize redness.
Steps to Craft Your Foundation:
- Sift and Combine: Start by sifting your mineral powders to avoid clumps.
- Add Your Binder: Gradually incorporate your chosen binder until you reach a desired consistency.
- Test Your Shade: Apply a small amount on your jawline to see if it matches your skin tone.
In my experience, this process feels deeply satisfying. The customization possibilities are endless, and it’s rewarding to know you’re using pure ingredients. So go ahead, unleash your inner chemist and have fun with it!
Essential Ingredients for Crafting Your Own Beauty Products
Creating your own beauty products is an enchanting journey, one that lets you blend creativity with self-care. Over the years, I’ve discovered that the magic lies not only in the artistry but also in the essential ingredients that form the foundation of our concoctions. Let me share some key components that I’ve found indispensable in my beauty crafting adventures:
Essential Ingredients:
-
Mineral Powders
These are the stars of the show! Look for:- Mica: Adds shimmer and shine, making your creations come alive.
- Zinc Oxide: A natural sunblock that also soothes the skin.
- Titanium Dioxide: Offers a soft-focus effect, blurring imperfections.
-
Natural Oils
Oils are the nourishing embrace your skin craves. Consider:- Jojoba Oil: Mimics the skin’s natural oils, making it a perfect moisturizer.
- Coconut Oil: Rich in fatty acids, it hydrates and adds a tropical scent.
- Rosehip Oil: Packed with vitamins and antioxidants, it revitalizes tired skin.
-
Botanical Extracts
Harness the power of nature:- Aloe Vera: A soothing gel that calms irritation and hydrates.
- Chamomile Extract: Perfect for sensitive skin, offering anti-inflammatory benefits.
- Green Tea Extract: A powerhouse of antioxidants that fights free radicals.
-
Natural Preservatives
Keep your creations fresh and vibrant:- Vitamin E: An antioxidant that helps extend shelf life.
- Rosemary Extract: A natural preservative that also adds a lovely herbal scent.
-
Colorants
Infuse your products with personality:- Beet Powder: Adds a pop of vibrant red while nourishing the skin.
- Spirulina: A striking green color that’s also rich in nutrients.
Crafting your own beauty products not only allows for personalization but also gives you peace of mind knowing exactly what’s going onto your skin. So, grab your mixing bowl and let your imagination run wild!
Choosing the Right Minerals for Your Custom Blends
With respect to crafting a custom mineral blend, choosing the right minerals isn’t just about colors it’s about creating a formula that works in harmony with your skin and preferences. From my own experience, selecting the best minerals is like composing a symphony, where every element needs to complement the other for a flawless performance.
Here’s a roadmap for picking the right minerals:
-
Base Minerals: Your base is the foundation literally! Look for soft, lightweight minerals like mica or zinc oxide to create a smooth, even canvas. They work wonders for sensitive skin and provide a natural glow without feeling heavy.
-
Tinting Elements: Now, this is where it gets fun. Oxides and ultramarines are the pigments that bring your creation to life. Whether you’re going for a sun-kissed bronze or a delicate blush, these minerals can be mixed to achieve exactly what you want. Don’t be afraid to experiment sometimes, an unexpected blend can turn out to be your favorite.
-
Finish Enhancers: Want to add a bit of drama or keep things subtle? Titanium dioxide is your go-to for a silky matte finish, while a sprinkle of silk powder can add a soft, satin sheen. It’s all about knowing what effect you’re after and adjusting your mix accordingly.
-
Skin Boosters: Why not give your blend some skin-loving properties? Minerals like kaolin clay can absorb excess oil, making your blend perfect for oily skin. Magnesium stearate, on the other hand, gives it a longer-lasting, smoother finish.
At the end of the day, it’s about creating something unique that feels like an extension of yourself. Trust your instincts, and you’ll find that perfect mineral combination.
How to Create a Smooth Base with Natural Ingredients
Creating a smooth, flawless base doesn’t have to mean piling on synthetic ingredients. Trust me, I’ve spent years experimenting with natural alternatives, and you can achieve that same velvety finish using the simplest of ingredients. Your skin will thank you later.
Key Ingredients for a Smooth Canvas
Let’s start by focusing on the essentials that build a naturally radiant foundation. These ingredients do more than just sit on your skin they nourish it.
- Kaolin Clay: Known for its oil-absorbing properties, kaolin clay creates a soft, matte texture without clogging pores. It works like a charm for those midday touch-ups, giving you that ‘just-applied’ look.
- Arrowroot Powder: It’s lightweight, silky, and adds a soft-focus finish to your skin. If you’re after a smooth texture without any heaviness, this ingredient has got you covered.
- Jojoba Oil: Think hydration without the grease. Jojoba oil mimics your skin’s natural sebum, ensuring your base stays smooth and supple all day long.
- Zinc Oxide: For a little sun protection with a flawless finish, zinc oxide is a mineral that blends into your skin and provides that silky base we all crave.
Steps to Create Your Smooth Base
You don’t need a beauty lab; your kitchen can easily serve as your beauty bar.
- Blend Your Base: Start with a mix of kaolin clay and arrowroot powder. Adjust ratios based on your skin type more arrowroot for dry skin, more clay for oily skin.
- Add Jojoba for Smoothness: A few drops of jojoba oil can make all the difference. It keeps the base smooth and prevents any cakey texture.
- Dust & Buff: Use a soft brush to dust your creation over your face, blending gently for a seamless finish.
Now, go forth and glow!
Steps for Mixing and Blending Minerals for Perfect Coverage
Mixing and blending minerals for that flawless finish feels a bit like alchemy. The secret to Making Mineral Makeup lies in a delicate balance of art and science, one that you can easily master with a few simple steps. Start by choosing the right base minerals these form the heart of your creation, the foundation upon which the rest will dance.
When combining pigments, I like to think of it as a painter blending colors on a palette. Each hue should be added in careful whispers, not rushed strokes. Start small, gradually building until you reach the desired intensity. Believe me, it’s easier to add more than to tone it down later.
Now, when it comes to texture, that’s where the magic happens. Grinding your minerals is essential to achieving that silky feel. I’ve found using a coffee grinder or mortar and pestle works wonders for achieving a soft, cloud-like powder. Consistency is key smoothness ensures even coverage, giving you that professional finish.
Don’t forget to test! I always dab a little on my wrist to check how it blends with the skin. If it feels too heavy or patchy, adjust the ratio of mica or titanium dioxide. A small tweak can transform a good blend into a perfect one.
Blending minerals is a calming, almost meditative process. The satisfaction comes when you see how the elements harmonize to create a flawless, radiant look. And trust me, once you’ve perfected this craft, you’ll never want to buy off-the-shelf again.
Customizing Colors: Mixing Pigments for Your Skin Tone
With respect to customizing colors, I’ve found that the real magic happens when you mix pigments tailored to your unique skin tone. Forget those off-the-shelf shades that seem to miss the mark; let’s create something that feels like it’s part of you.
Start by embracing the endless palette nature offers. Each pigment is like a personality, vibrant and wild. You’ve got to get to know them, just like you would a new friend. Some will blend seamlessly into your skin, while others might surprise you with their unexpected harmony.
To mix the perfect shade, it’s essential to think about more than just your undertone. Warmth, coolness, and the interplay of light all dance on your skin throughout the day. That’s why I prefer to layer colors like a painter would on canvas gradually building, tweaking, and perfecting until it reflects your true glow.
Here’s where it gets personal. You’re not just matching a foundation to your skin you’re creating a story, a reflection of who you are. And if you ever feel stuck, I’ve learned that sometimes the answer isn’t to start over but to add just one more drop of something unexpected like a touch of rose or gold.
This is the freedom that comes from creating your own shades. There’s no more settling for almost-right matches. It’s all about owning your color and wearing it with a confidence that only comes when you know it’s made for you, by you.
Adding Shimmer and Glow: Tips for a Luminous Finish
With regard to adding that perfect shimmer to your look, the key is all about subtlety. From my personal experience, I’ve learned that a little glow can go a long way. You don’t want to end up looking like a disco ball, right? Let me share some of my favorite techniques for achieving that luminous finish that’s both flattering and versatile.
Start with a glowing base
- Prep your skin: Hydration is your best friend. I always make sure to apply a light, dewy moisturizer before anything else. It creates a natural radiance that sets the tone for the entire look.
- Choose a radiant primer: This is where the magic begins. Pick one that has a bit of shimmer in it it’ll help catch the light in all the right ways.
Strategic highlighting
- Focus on high points: Think cheekbones, brow bones, and the bridge of your nose. These are the areas where light naturally hits your face. But here’s my secret: add a touch to the center of your eyelids for a subtle, eye-catching gleam.
- Blend, blend, blend: The art of the glow is all in the blending. Harsh lines are a no-go, so make sure to buff the product in gently for a seamless finish.
Finishing touches
- Setting spray with a glow: Once you’ve perfected your luminous look, lock it in with a setting spray that has a hint of shimmer. Not only does it keep everything in place, but it also adds a soft, lit-from-within glow that lasts all day.
The secret is knowing how to let the light play with your makeup, giving you that radiant finish without overpowering your natural beauty.
The Key Insights on Making Mineral Makeup
As for crafting mineral cosmetics, it’s not as complicated as you might think. From my own experience, it’s all about balancing the right natural ingredients with a dash of creativity. Think of it as cooking up a recipe for glowing skin, but with a touch of science and a sprinkle of art.
Key Ingredients to Highlight:
- Mica: This is your magic dust. It adds that radiant shimmer you love without feeling like you’ve just rolled in glitter.
- Zinc Oxide and Titanium Dioxide: These two are the ultimate skin protectors, providing natural SPF and keeping your skin calm. Talk about multitasking heroes!
- Iron Oxides: Here’s where the color comes in whether you’re going for soft nudes or bold hues, these minerals will give your makeup its unique pigment.
The Crafting Process:
- Sourcing Pure Ingredients: The first and most important step is finding high-quality, naturally sourced minerals. There’s no compromise here purity is key to achieving a smooth and lightweight finish.
- Blending the Magic: This is where you take your raw materials and get them to play nice together. Blending by hand gives you more control over the texture and consistency, ensuring every powder is fine enough to glide onto the skin.
- Tailoring to Your Skin Needs: It’s not just about looks understanding skin types helps tailor the product to work for oily, dry, or sensitive skin. Trust me, your skin will thank you later.
Mineral-based cosmetics feel light as air but pack a punch when it comes to skin benefits. If you’ve ever wondered what it’s like to make these, the process is much more about intention and detail than meets the eye.
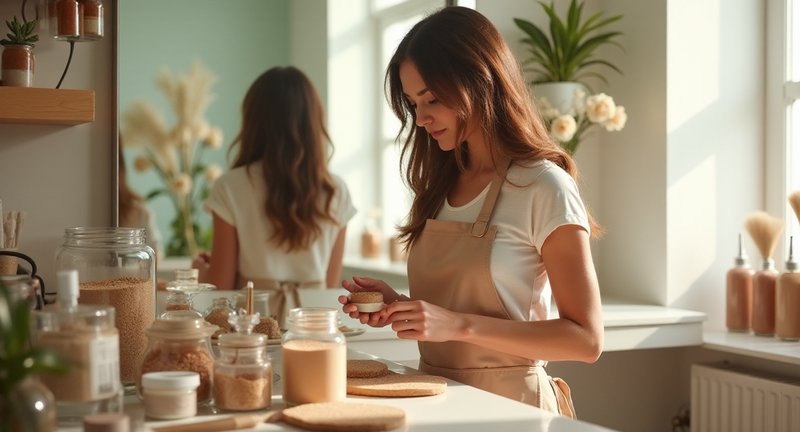
The Role of Binders and Fillers in Natural Makeup Formulas
With respect to natural makeup formulas, binders and fillers often take the backstage, but they deserve more credit than we give them. Let me explain why these unsung heroes matter so much. Binders and fillers are like the glue and structure of your makeup – they ensure that your foundation or eyeshadow doesn’t crumble into dust, quite literally.
Binders: The Invisible Glue
You know that smooth glide when you apply your foundation? Binders are responsible for that velvety texture. Here’s what they do:
- Hold the formula together: Binders prevent powders from separating, giving a seamless finish.
- Boost longevity: They help your makeup last longer on your skin without smudging or fading.
- Create a creamy feel: Some natural binders, like jojoba oil or lecithin, enhance that luxurious application experience.
Fillers: The Supporting Cast
Now, fillers may sound like the less glamorous part of the makeup equation, but they’re the secret to getting that flawless, airbrushed look. They’re the soft-focus filter in real life.
- Smoothing imperfections: Fillers like mica and silica blur fine lines and pores, making your skin look photo-ready.
- Adding volume and texture: Ever notice how a formula feels lightweight, yet full-bodied? That’s thanks to fillers, which add substance without feeling heavy.
- Controlling oil and shine: Many natural fillers absorb excess oil, giving you that matte, but not flat, look.
So next time you’re applying your favorite natural makeup, remember it’s not just pigments working their magic binders and fillers are silently working in harmony to perfect your glow.
Tools and Equipment You Need for Mineral Makeup Creation
In the context of crafting your own mineral makeup, the first thing you’ll need is a reliable set of scales. Precision is key when mixing natural ingredients no room for guesswork here. I’ve always leaned on my trusty digital scale, as it ensures I get the balance just right.
Next up is your mixing equipment. You’d be surprised how far a small mortar and pestle can take you. These little tools have a kind of magic in blending pigments seamlessly, like alchemy in action. And let me tell you, nothing beats the satisfaction of grinding those minerals by hand.
For storing your concoctions, I swear by small, airtight containers. Keeping your blends fresh and uncontaminated is non-negotiable. Plus, these little jars add a touch of luxury to the process. You’ll thank yourself later when every powder stays as pristine as the day you mixed it.
Don’t forget about safety gear gloves and a mask are essential. Even the finest powders can irritate if you’re not careful. I’ve learned this the hard way after one too many sneezes mid-mixing!
Also, an assortment of measuring spoons is your best friend. I never thought I’d feel this way about something so simple, but they’re like keys to the kingdom, unlocking perfectly measured portions for a flawless result. Precision, once again, rules the day.
Making Your Own Pressed Powders vs. Loose Powders
When it comes to powders, there’s a bit of a showdown between pressed and loose. I’ve dabbled in both, and let me tell you, each has its charm. Pressed powders, in their sleek little compacts, bring that on-the-go convenience. You just toss one in your bag, and you’re good for a quick touch-up anywhere.
But if you ask me, loose powders are where the magic happens. They’re the free-spirited cousin of pressed powders no boundaries, no limits. The texture is light as air, and you get more control over how much you use. With a fluffy brush in hand, it feels almost meditative applying them.
Now, making your own? That’s a whole different adventure. With pressed powders, it’s all about getting that perfect ratio of powder to binder. Too little, and it crumbles like a forgotten cookie. Too much, and it feels like you’re slathering paste.
Loose powders? Easier, I’d say. It’s more about blending ingredients that flow together seamlessly, no need to compact or bind. But be prepared for a mess it’s like working with fairy dust, lovely but everywhere.
So, pressed or loose, the decision comes down to how you want to use it and what kind of experience you’re after. Personally, I like having both in my makeup arsenal. Some days I need that sleek, no-fuss approach, and others, I’m all for the airy, delicate feel of a loose powder dusting.
Safe and Natural Preservatives for Long-Lasting Cosmetics
Preserving the freshness of your cosmetics is like protecting a delicate secret. It’s not just about the product, but also about what’s inside that keeps it lasting longer while still being gentle on your skin.
From my experience, I’ve found that nature often provides the best solutions. Take rosemary extract, for example. Its antioxidant properties not only smell divine but also work wonders to keep oils from turning rancid.
Another unsung hero? Vitamin E. This little powerhouse not only nourishes the skin but also extends the shelf life of your cosmetics by slowing down oxidation. Think of it as the bodyguard of your beauty essentials.
Then there’s grapefruit seed extract, an all-natural preservative that I’ve come to trust. It’s gentle yet potent enough to fight off harmful bacteria and molds giving your products an extra lease on life without the harsh chemicals.
For a truly natural preservative, I swear by beeswax. Aside from adding texture and richness, it acts as a barrier, keeping moisture in and bad stuff out.
When you choose safe and natural preservatives, you’re not just extending the life of your cosmetics. You’re also making a conscious choice for your skin’s health and the environment. Why settle for artificial, when nature gives us everything we need?
Clear Explanations
How is mineral makeup made?
Mineral makeup is crafted from natural mineral ingredients that are finely milled into a powder form. Common minerals used include zinc oxide, titanium dioxide, and iron oxides, which serve not only as pigments but also provide sun protection and other skin benefits. The production process typically involves sourcing these minerals, grinding them into a fine consistency, and then blending them in specific proportions to achieve the desired color and texture. The final product is often free from synthetic additives, making it a popular choice for those seeking a more natural cosmetic option.
How to make mineral powder at home?
Making mineral powder at home can be a fun and rewarding process. Start by selecting natural minerals such as arrowroot powder or cornstarch for the base, combined with pigments like cocoa powder or turmeric for color. Using a mortar and pestle or a grinder, finely blend the ingredients until you achieve a smooth texture. It’s essential to experiment with ratios to get the desired shade and coverage. As a matter of fact, store the homemade mineral powder in an airtight container to maintain its freshness and effectiveness for your makeup routine.
What mineral is used in makeup?
Several minerals are commonly utilized in makeup formulations, each serving unique purposes. Titanium dioxide is widely used for its opacity and UV protection, making it a staple in foundations and sunscreens. Zinc oxide is another essential mineral known for its soothing properties and ability to reflect UV rays. Iron oxides are popular pigments, providing a range of colors from reds to browns. These minerals are favored for their natural origins and skin-friendly qualities, often appealing to those seeking healthier cosmetic options.
Is mineral makeup better for aging skin?
Mineral makeup is often considered beneficial for aging skin due to its lightweight texture and skin-friendly ingredients. Unlike traditional makeup, which may contain heavy oils and preservatives, mineral formulations are typically non-comedogenic and free from irritating additives, making them less likely to clog pores. They often contain beneficial minerals like zinc oxide and titanium dioxide, which can soothe sensitive skin and provide sun protection. Additionally, the natural finish of mineral makeup can help minimize the appearance of fine lines and wrinkles, offering a more youthful glow.
Does mineral makeup clog pores?
Mineral makeup is generally less likely to clog pores compared to conventional makeup products. The formulation is typically free from heavy oils and synthetic ingredients that can lead to breakouts. Minerals like zinc oxide and titanium dioxide are non-comedogenic, meaning they won’t block pores. However, individual skin types and sensitivities may vary, so it’s crucial to choose products that suit your skin and to remove makeup thoroughly at the end of the day to prevent any potential build-up.
Where does mineral makeup get its color?
The color in mineral makeup comes from naturally occurring pigments derived from minerals. Iron oxides are a primary source, providing a spectrum of colors, including reds, yellows, and browns. Additionally, other minerals like ultramarines and titanium dioxide are used to achieve different shades and finishes. The specific blending of these minerals allows for a wide range of shades suitable for various skin tones. Because these pigments are natural, they often offer a softer, more muted appearance compared to synthetic dyes used in conventional makeup.
How to make mineral eyeshadow?
To create mineral eyeshadow at home, gather a few basic ingredients, including mica powder for shimmer, iron oxides for color, and a binding agent like arrowroot powder or cornstarch. Start by combining the desired pigments in small amounts, adjusting for color intensity as you go. You can add a few drops of a carrier oil to help the mixture adhere better when applied. Once blended to your satisfaction, store the eyeshadow in a small container, ensuring it’s well-sealed to maintain its freshness and vibrancy.
Which mineral is used to make face powder?
The primary minerals used in face powder formulations include talc, kaolin clay, and silica. Talc is known for its oil-absorbing properties and silky texture, making it a common choice for setting powders. Kaolin clay provides a lightweight feel and can help control shine without being overly drying. Silica offers a soft-focus effect, smoothing out skin texture. Many mineral face powders also contain zinc oxide and titanium dioxide for additional skin benefits and sun protection, appealing to those looking for a natural finish.
Is mineral powder good for your face?
Mineral powder can be an excellent option for the face, particularly for those with sensitive or acne-prone skin. Its natural ingredients often include beneficial minerals that provide sun protection and help soothe irritation. Mineral powders tend to have a lightweight formula that allows the skin to breathe, reducing the likelihood of clogged pores. Additionally, they often contain oil-absorbing properties, making them suitable for those with oily skin. However, it’s essential to choose high-quality products to reap the full benefits of mineral makeup.
Does mineral makeup have chemicals?
Mineral makeup is generally known for being free from many synthetic chemicals commonly found in conventional cosmetics. Instead, it relies on natural minerals as its primary ingredients. However, it’s essential to note that some brands may include additional components, such as preservatives or fragrances, to enhance product stability and longevity. To ensure you’re using a truly clean product, it’s best to read ingredient labels carefully and look for brands that emphasize their commitment to natural formulations.
Is mineral makeup better than regular makeup?
Whether mineral makeup is better than regular makeup depends on individual skin types and preferences. Mineral makeup offers several advantages, including a lighter feel, natural sun protection, and often fewer irritants, making it suitable for sensitive skin. It usually contains no synthetic dyes or preservatives, which can appeal to those seeking more natural options. However, some individuals may prefer the coverage and finish of traditional makeup, which can be more versatile for various looks. Also, it’s about finding what works best for your skin and lifestyle.
Is mineral makeup clean?
Mineral makeup is often considered a cleaner alternative to conventional makeup due to its natural ingredient base. Many formulations are free from synthetic additives, parabens, and fragrances, making them appealing to those looking for healthier options. Additionally, mineral makeup typically has fewer irritants, which is beneficial for sensitive skin. However, the term ‘clean’ can vary by brand, so it’s essential to research products and look for those that prioritize transparency in their ingredient lists to ensure you’re getting the cleanest formulations possible.



I completely agree that customizing colors is where the real magic happens! It’s like creating your signature style, one that reflects your personality. I love how you compared pigments to personalities what a fun analogy! I’ve always found that layering different shades really helps in finding that perfect match, especially for changing seasons. I often play with unexpected additions, like a touch of shimmer or warmth, to enhance my natural glow. Your insight about understanding the interplay of light on our skin is so true; it makes all the difference! It’s empowering to know that we can create something uniquely ours instead of settling for generic shades. Keep up the fantastic work, and thanks for inspiring us all to express our individuality through color!
Your description of blending minerals like a painter is so inspiring! I totally resonate with the meditative quality of the process. It’s true; taking that time to mix and perfect can yield such beautiful results! I’ve been blending my own mineral makeup for a while, and it’s incredible how satisfying it is to see everything come together. Plus, the ability to customize texture and coverage to suit my skin type is a real game changer. Your tip about testing the blend on your wrist is so practical! Thanks for sharing your wisdom it’s always great to connect with fellow makeup enthusiasts who appreciate the art of blending!
I absolutely love your take on creating a flawless base using natural ingredients! As someone who’s experimented with DIY beauty products, I couldn’t agree more that less is often more. Kaolin clay and jojoba oil are game-changers in my routine too! It’s amazing how these simple ingredients can not only provide that smooth finish but also nourish our skin without any harsh chemicals. I often mix a bit of arrowroot powder for those days when I need a little extra oil absorption. Plus, the fact that you can create this all in your kitchen makes it feel even more special and personalized! Thank you for sharing these steps; they make the process feel approachable and fun. Can’t wait to try this out and glow from within!
The comparison of crafting a mineral blend to composing a symphony really resonates with me! It’s so true that each mineral plays its own unique role, and when combined thoughtfully, they create something beautiful. I love your idea of using kaolin clay to balance oiliness in the mix it’s such a practical yet creative touch! The idea of tinting elements like oxides and ultramarines for color experimentation makes this whole process sound like an artistic adventure. I’ve often felt overwhelmed by store-bought options, and your guide makes it feel approachable and exciting! I’m definitely going to try mixing my own shades. There’s something so fulfilling about creating a product that reflects who you are. Here’s to finding that perfect blend and having fun with the process! Can’t wait to hear about everyone else’s experiences too!
Wow, I really appreciate how you highlight the importance of essential ingredients in DIY beauty crafting! It’s so crucial to know what goes on our skin. I’ve been curious about trying natural oils like rosehip and jojoba, especially after hearing how they mimic our skin’s oils. Plus, who wouldn’t want to smell like coconut while moisturizing? Definitely going to grab those ingredients for my next project!
I absolutely love the idea of crafting my own mineral foundation! There’s something so empowering about knowing every ingredient that goes onto your skin. I’ve dabbled in makeup creation before, and it feels like a mini science experiment every time! The combination of mica, titanium dioxide, and jojoba oil is pure genius. Not only do these ingredients sound fantastic, but they also make your skin feel amazing! I especially appreciate the tip about testing the shade on the jawline it really does help find that perfect match. Plus, incorporating natural ingredients like spirulina for color adds a unique twist that I hadn’t considered before. It’s like making your own magic potion! I can’t wait to dive into this process, and I’m sure it’ll be a fun and rewarding journey. Who knew beauty could feel so personal and creative? Cheers to unleashing our inner chemist and rocking our custom foundations! Can’t wait to see what fun colors and combinations others come up with as
Love this! There’s nothing quite like creating your own beauty products. It’s so fun to experiment with natural pigments and oils, and the process is surprisingly easy once you get into it. Plus, knowing exactly what’s going onto your skin just feels so empowering!
I couldn’t agree more with everything you’ve said about the benefits of mineral makeup. When I switched to making my own, my skin immediately thanked me! Knowing that what I’m putting on my face is natural and actually good for my skin has been a game-changer.
Oh my goodness, this takes me back to when I first started making my own mineral makeup! I can totally relate to the feeling of stepping into an almost magical world, where the transformation of raw powders into a flawless, natural look feels like you’re working with beauty potions. I still remember the first time I made my perfect foundation shade it was like discovering a beauty secret that only I knew.